Dimension is a numerical value used on engineering drawing to describe size, shape, location, geometric characteristics or surface texture. orDimension is a measurement graphically shown on engineering drawing. It can be a measurement of size on part i.e. a hole diameter or a measurement of location of feature on a part i.e. the spacing between holes.There are three types of measurement.
1. Functional Dimension: A dimension is necessary to the function of the part i.e. screw thread size.
2. Non-Functional Dimension: A dimension is not necessary to the function of the part i.e. thread height.
3. Auxiliary Dimension: The dimension that is for information only [or called as reference dimension, is
enclosed in brackets i.e. (20)].
Example:
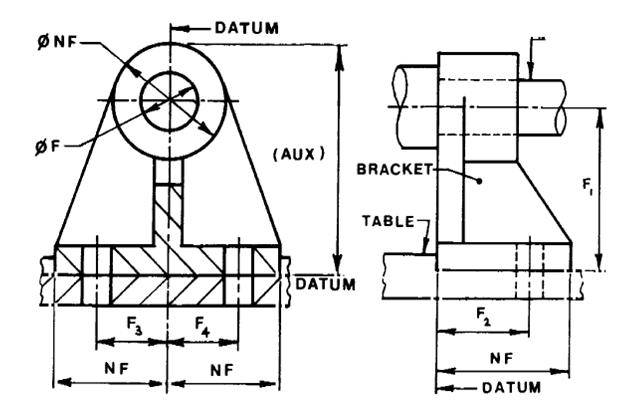
The main function of the components in the assembly shown in Figure 4.1 is to support a shaft. Hence the functional location dimension, F1, is between the hole centre and the datum mating face. The fixing holes must be positioned in relation to the shaft
and the shoulder on the mating face of the table. The functional dimension F2 is used for this purpose.
The same dimension F2 will apply to the bracket and the table. Also, the centre lines of the holes must be positioned relative to the vertical datum using the functional dimensions F3 and F4. Functional dimensions are used for production and inspection purposes. They should always be toleranced.
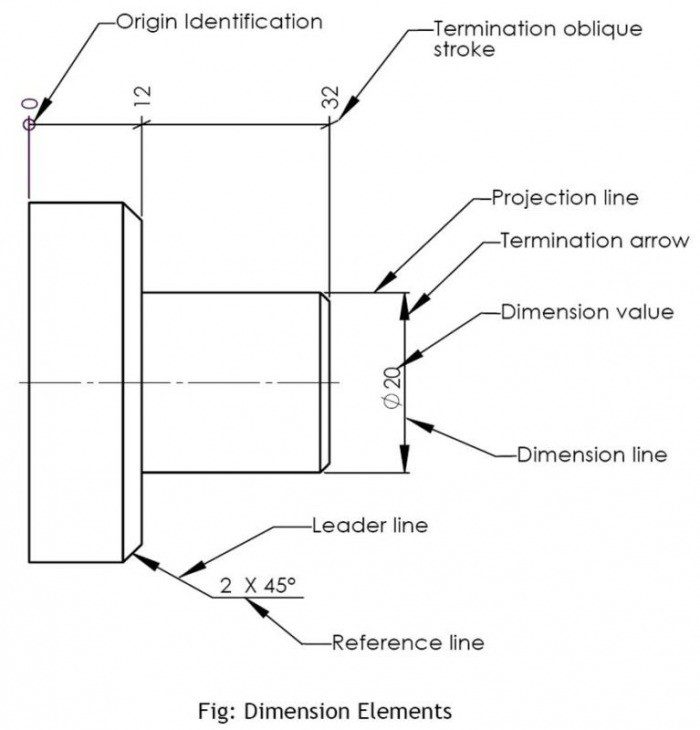
Dimension Elements:
There are six dimension elements.
1. Dimension value
2. Dimension line
3. Projection line
4. Leader line
5. Termination (arrow head, oblique stroke or dot)
6. Origin Identification (open circle)
Dimension orientation:
There are two methods of dimensioning.
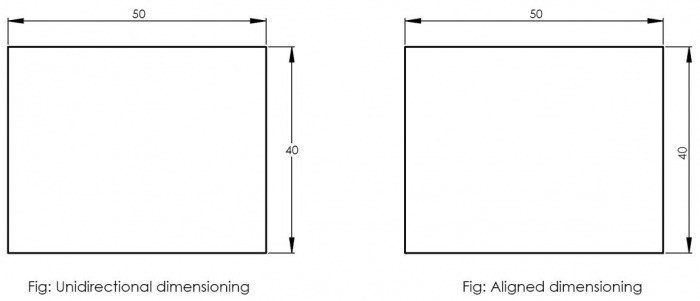
1. Unidirectional dimensioning
2. Aligned dimensioning
1. Unidirectional dimensioning:
Unidirectional dimensions are placed on the drawing so they can be read from bottom of the drawing. To be placed in the middle and slightly above the dimensions line for horizontal dimension. To be placed in the middle but interrupting the dimension line for vertical dimension.For angular dimensioning the dimension value can be placed either on dimension line or interrupting the dimension line.
2. Aligned dimensioning:
Aligned dimensions are placed on the drawing so they can be read from bottom or right- hand side of the drawing. To be placed slightly above the dimension line. To be placed if possible middle of the dimension line
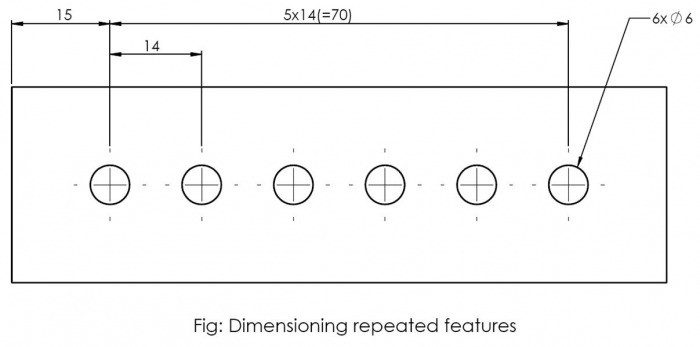
Equidistant and repeated dimensions:
When a repeated feature occurs on a part, the dimensioning of this feature can be simplified as following.


